One of my favorite memories of growing up in the Catskill mountains was the time of year where winter would start the often lengthy transition into spring, and the sugar maple trees would soon be adorned with gray metal sap buckets. It was a welcome sight, soon to be followed by steam billowing out of the tops of the many sugar shacks throughout the valley. I remember riding my bike up and down the main road through our town, and hearing the sap drip into the buckets. Back then, we didn’t have maple festivals, or large operations offering all you can eat pancakes on the weekend…it was just a way of life in the little town of Maplecrest.
When we bought our home several years ago, I was excited to see that we had a couple sugar maples on our property. Growing up, we did not have any maple trees of any size in our yard that we could tap. I was finally going to get my chance at making some delicious maple syrup first hand.
Making maple syrup is really not a very complicated process. Drill some holes in some maple trees, insert a ‘tap’, collect sap in a bucket, and boil it until it becomes delicious maple syrup. Sometimes things look a whole lot simpler on paper than they turn out to be in real life.
The first thing to understand is that it takes a whole lot of sap to make some syrup. The ‘normal’ ratio is about 40:1. Forty gallons of sap is required to make one gallon of syrup. This can vary throughout the season…and if you mix in any maples other than sugar maples, it’ll take more sap as well.
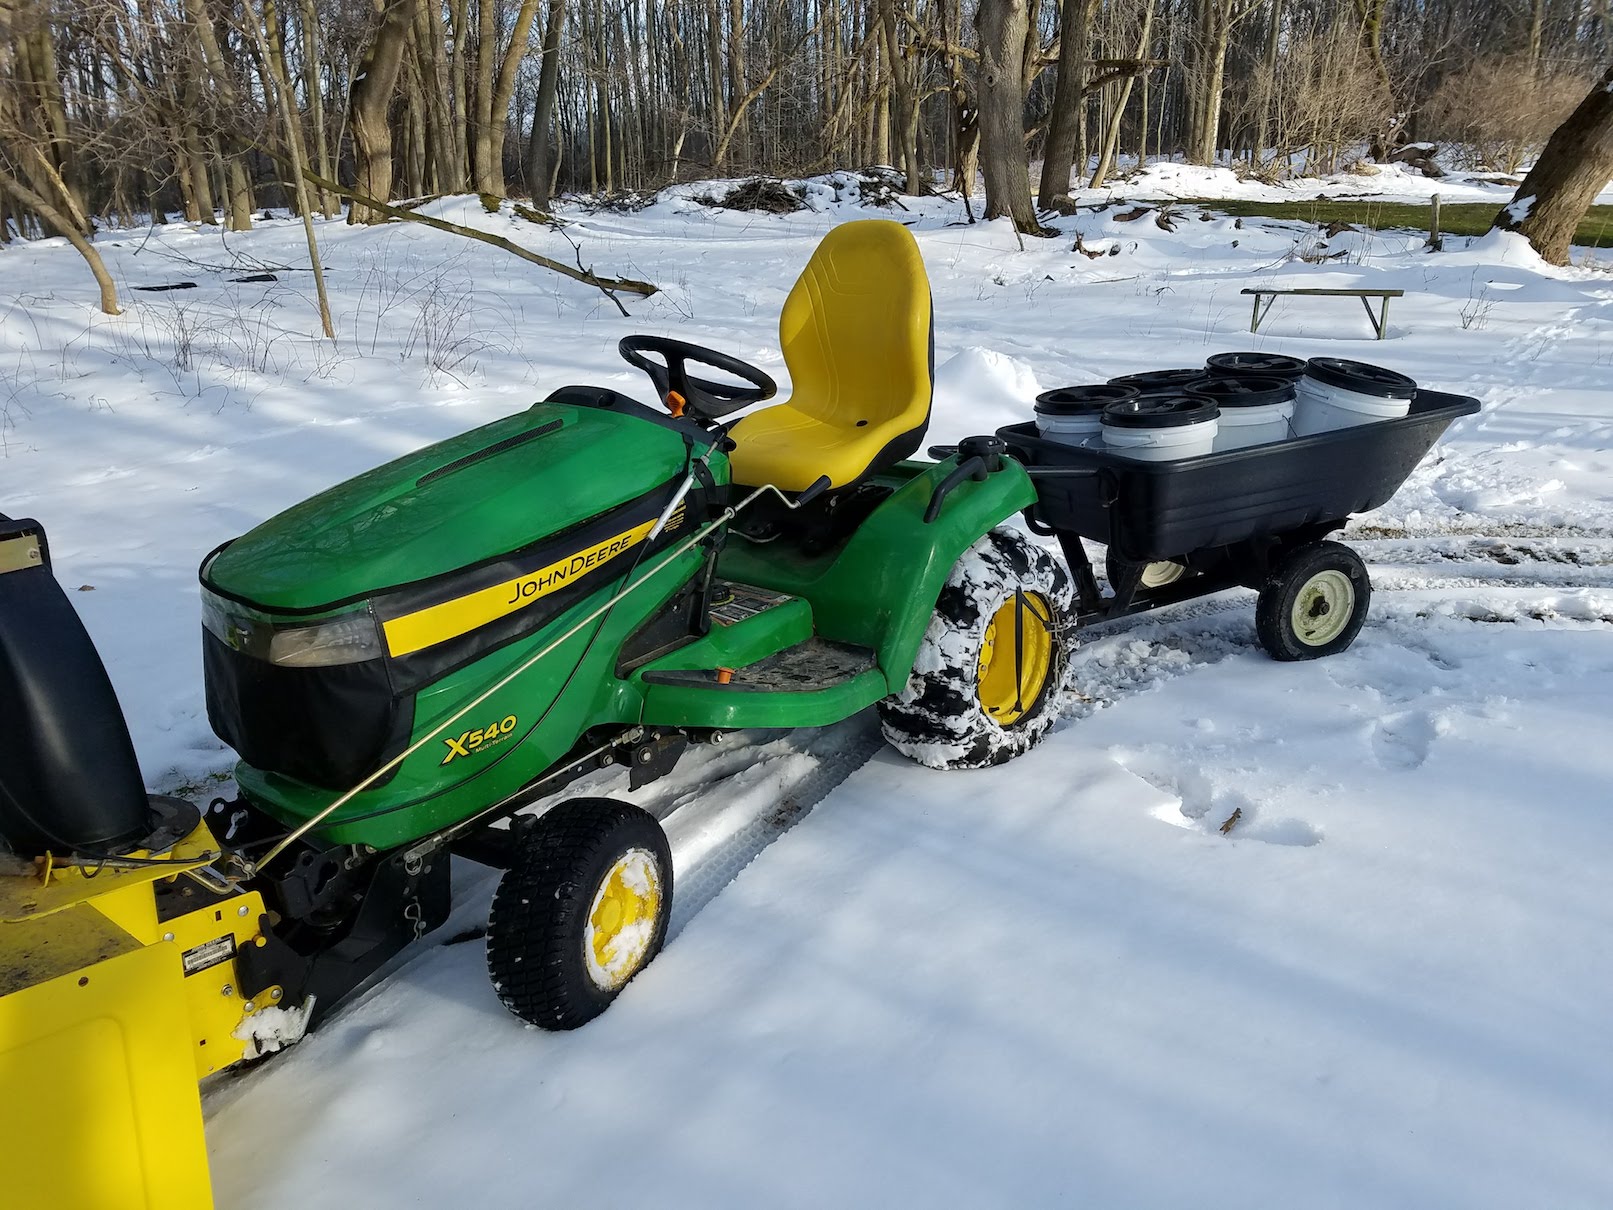
 The next thing to know is what it means to tap a tree. First you need to get some spiles and some sort of bucket or bag to hold the sap. A spile is basically a spigot you insert into the tree. The old traditional spile is metal and the bucket hangs on it. I use the 5/16” plastic spiles that are intended for tubing. Larger operations connect all the taps to a pipeline that draws the sap to the sugar house. I just run a short length of tubing from the spile to a 4 or 5 gallon food grade bucket sitting on the ground. I drill a 5/16” hole in the tree about 2” deep that is angled slightly upward so the sap wants to run out of the hole. When inserting the tap into the tree, tap it lightly into the drilled hole until it is seated. You don’t need to drive it home like a 16 penny nail. You don’t want to tap a tree that is less than 12” in diameter. The experts day a tree from 12-20” can support 1 tap, and trees larger than that can support 2 taps, some even say a tree over 27” can support 3 taps. Given that I’m tapping trees in the yard and in my neighbor’s yards, I take a very conservative approach, and only put 1 tap in each tree.
One question that often comes up is, what kind of Maple tree can be tapped for syrup. If you have Sugar Maples, that’s the best tree for the job. They have the highest sugar content in their sap, which means less boiling. Technically you also tap silver, red, black maples, as well as box elders. My yard is full of Norway maples. I’ve heard different opinions on tapping the Norways. This year I experimented with tapping one of them, and the sap flowed great, and when boiled down with all my other trees, I noticed no difference in the taste of my syrup.
 So, now that you know how to tap a tree, and what kind of tree to tap, you need to know when is the best time to tap. The optimal time to tap is when the evening temperatures are dropping below freezing and the day time temperatures are above freezing. The change in temperatures causes some type of pressure inside the tree causing the sap to flow. If daytime temps stay below freezing, or if evening temps stay above freezing, the flow of sap will be reduced. You’ll want to pull taps before the trees start to bud. This year, I tapped my trees on February 20th and I pulled the taps on March 25th. Technically, this year’s weather was still good for collecting for another week or two, but I had pretty much run out of time and was happy with my production for the year.
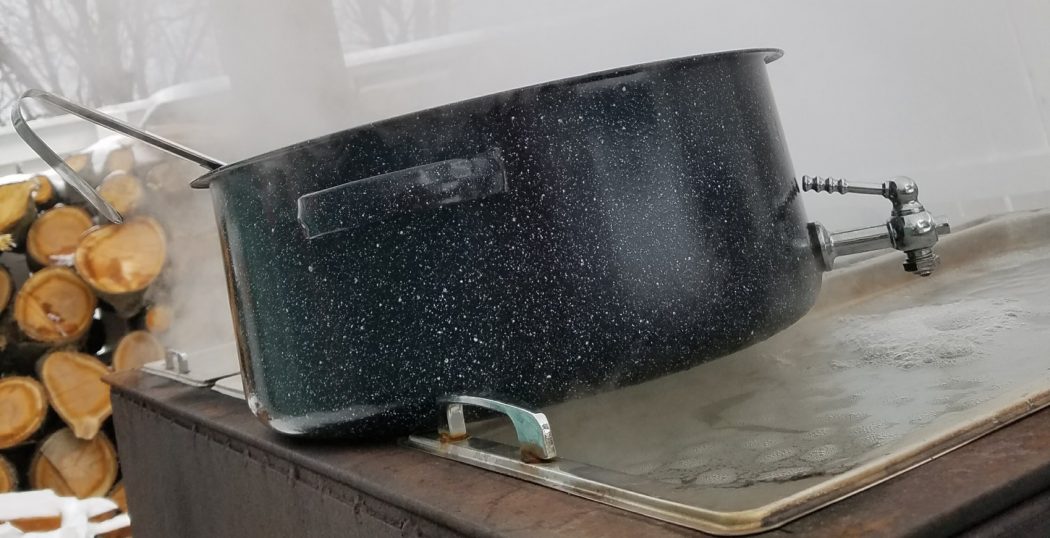
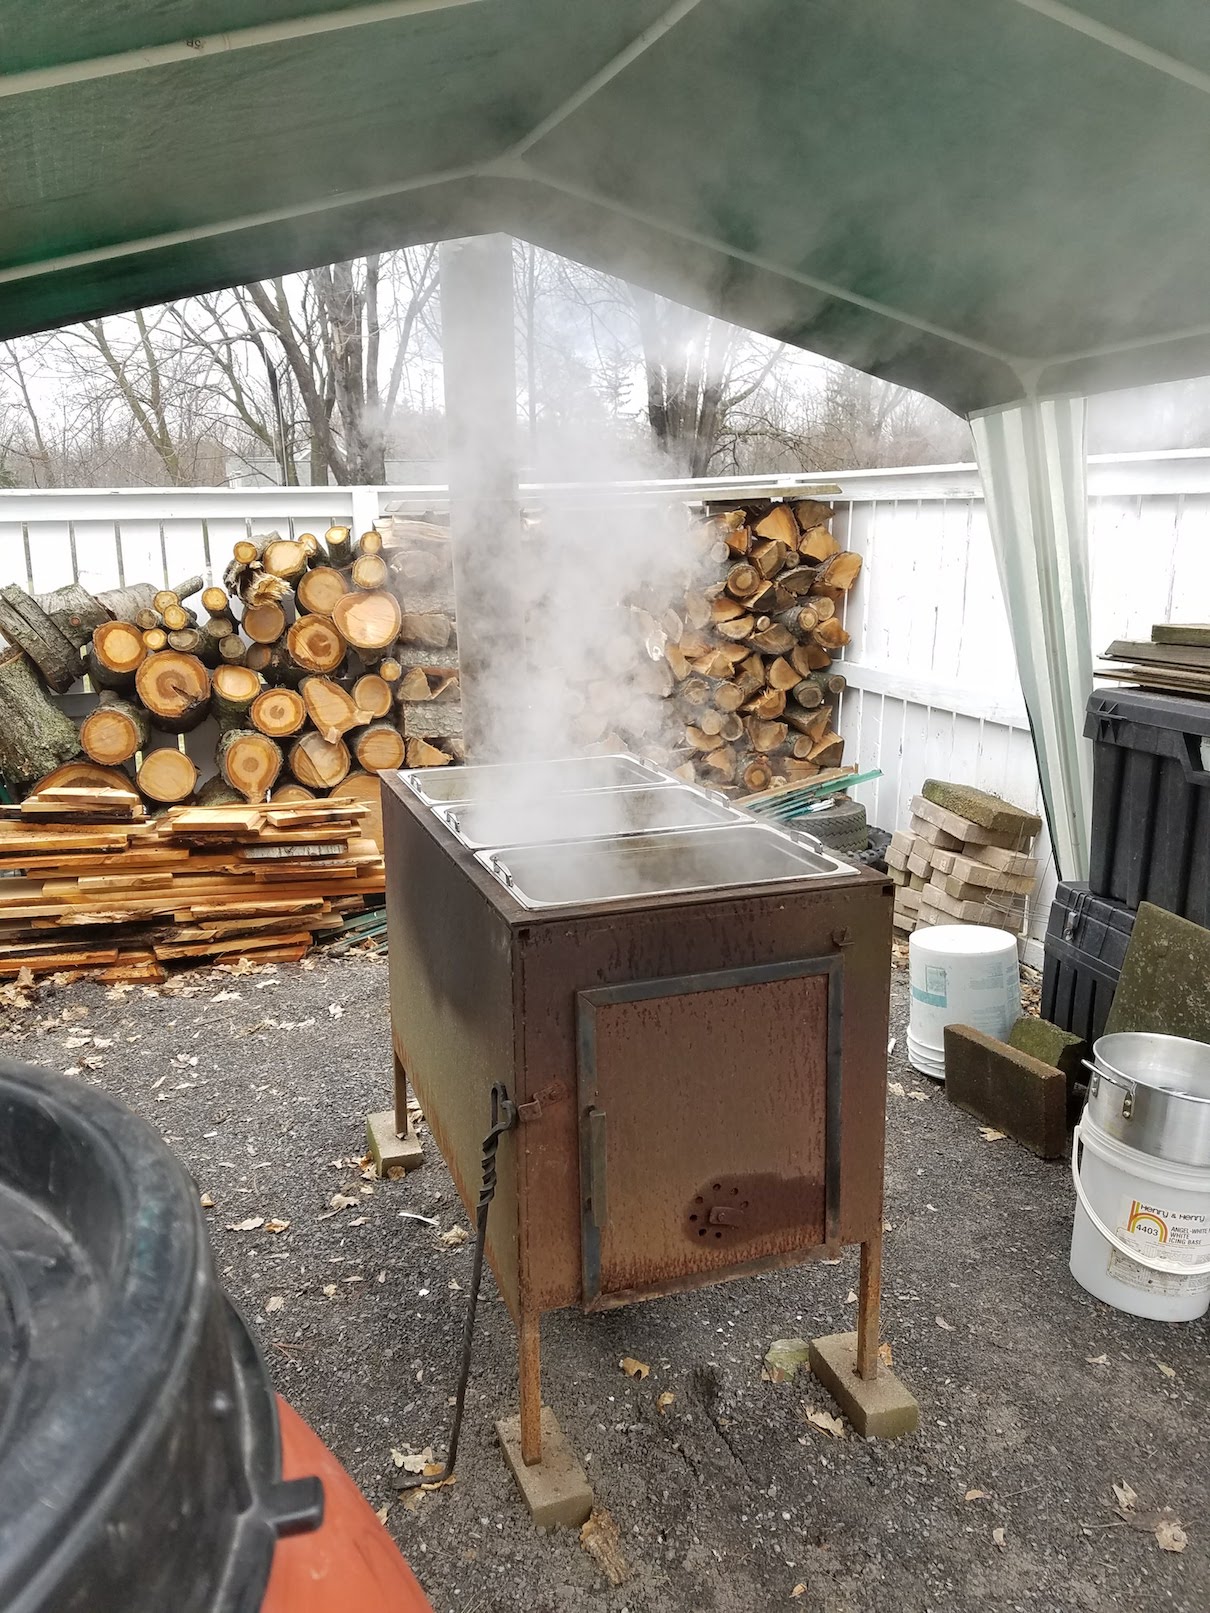
OK, we’ve covered how to tap, what trees to tap, when to tap, and storing your sap. The next step is to boil it. Again, not a terribly complicated process, boil gallons and gallons of sap until enough water content is gone that it becomes syrup. Easy right? Well, yes…but fast, no. It all comes down to surface area. 1 square foot of surface area, will boil off about a gallon per hour. So, if you have 40 gallons of sap, it’ll take about 39 hours of boiling in a 12”x12” pan to make syrup. That’s a lot of time. How big of a pan you’ll need depends on the size of your hobby operation. This year I only put out 8 taps, but I still collected 163 gallons of sap. Some people simply use a turkey fryer pan over a propane burner. I’ve even read of some folks placing a pan on their gas grill. My setup is a metal frame that holds 3 steam table pans that are about 20” x 12” each over a homemade wood fired metal arch. I started out using the same steam table pans over a cinder block arch, which worked OK, but wasn’t super efficient. With my current setup, I should technically be able to boil down about 6 gallons per hour. I probably average more like 5 gallons per hour. This means I can take 40 gallons of sap and make my 1 gallon of syrup in about 8 hours of boiling. Get a comfy lawn chair, set it up near the warmth of the fire, and watch…and contrary to what I’ve read on the internet, a watched pot does actually boil…eventually. Oh, and before I forget, you definitely won’t want to do a full boil in your kitchen. Boiling sap puts out a lot of steam, sticky steam, something you won’t want in your kitchen.
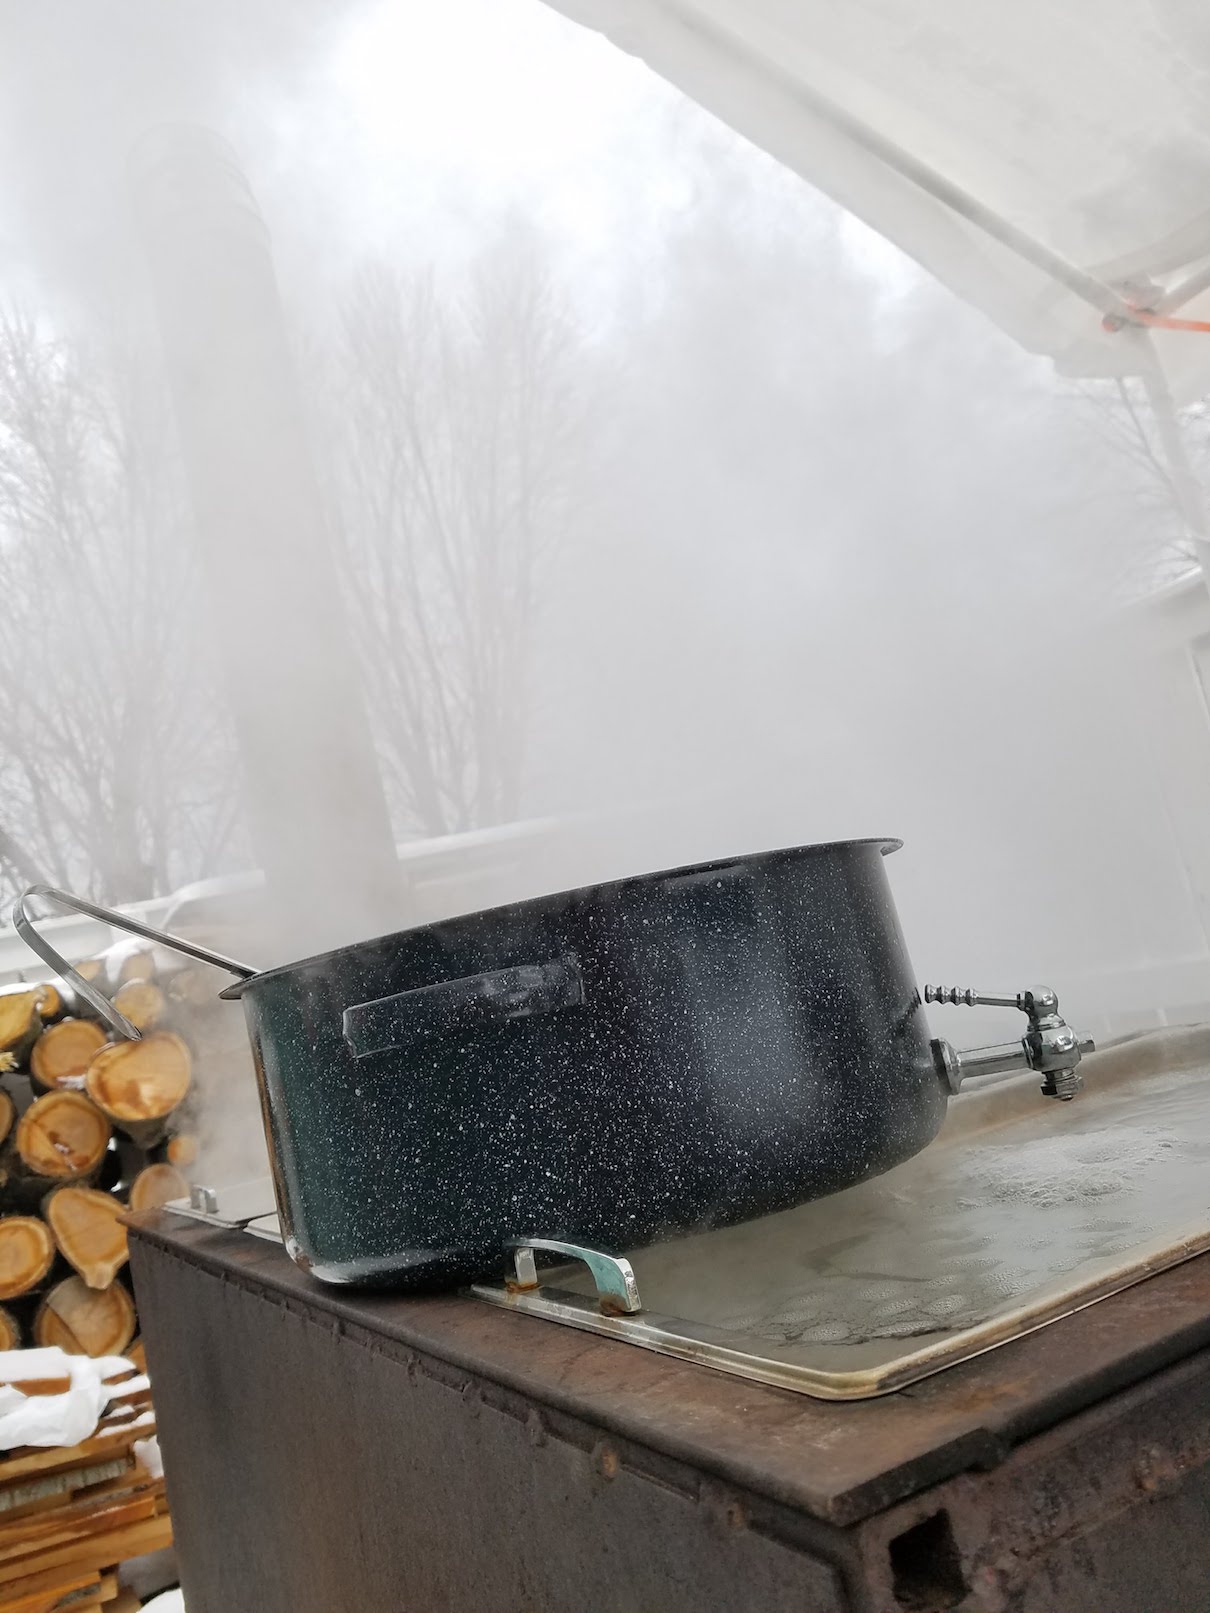
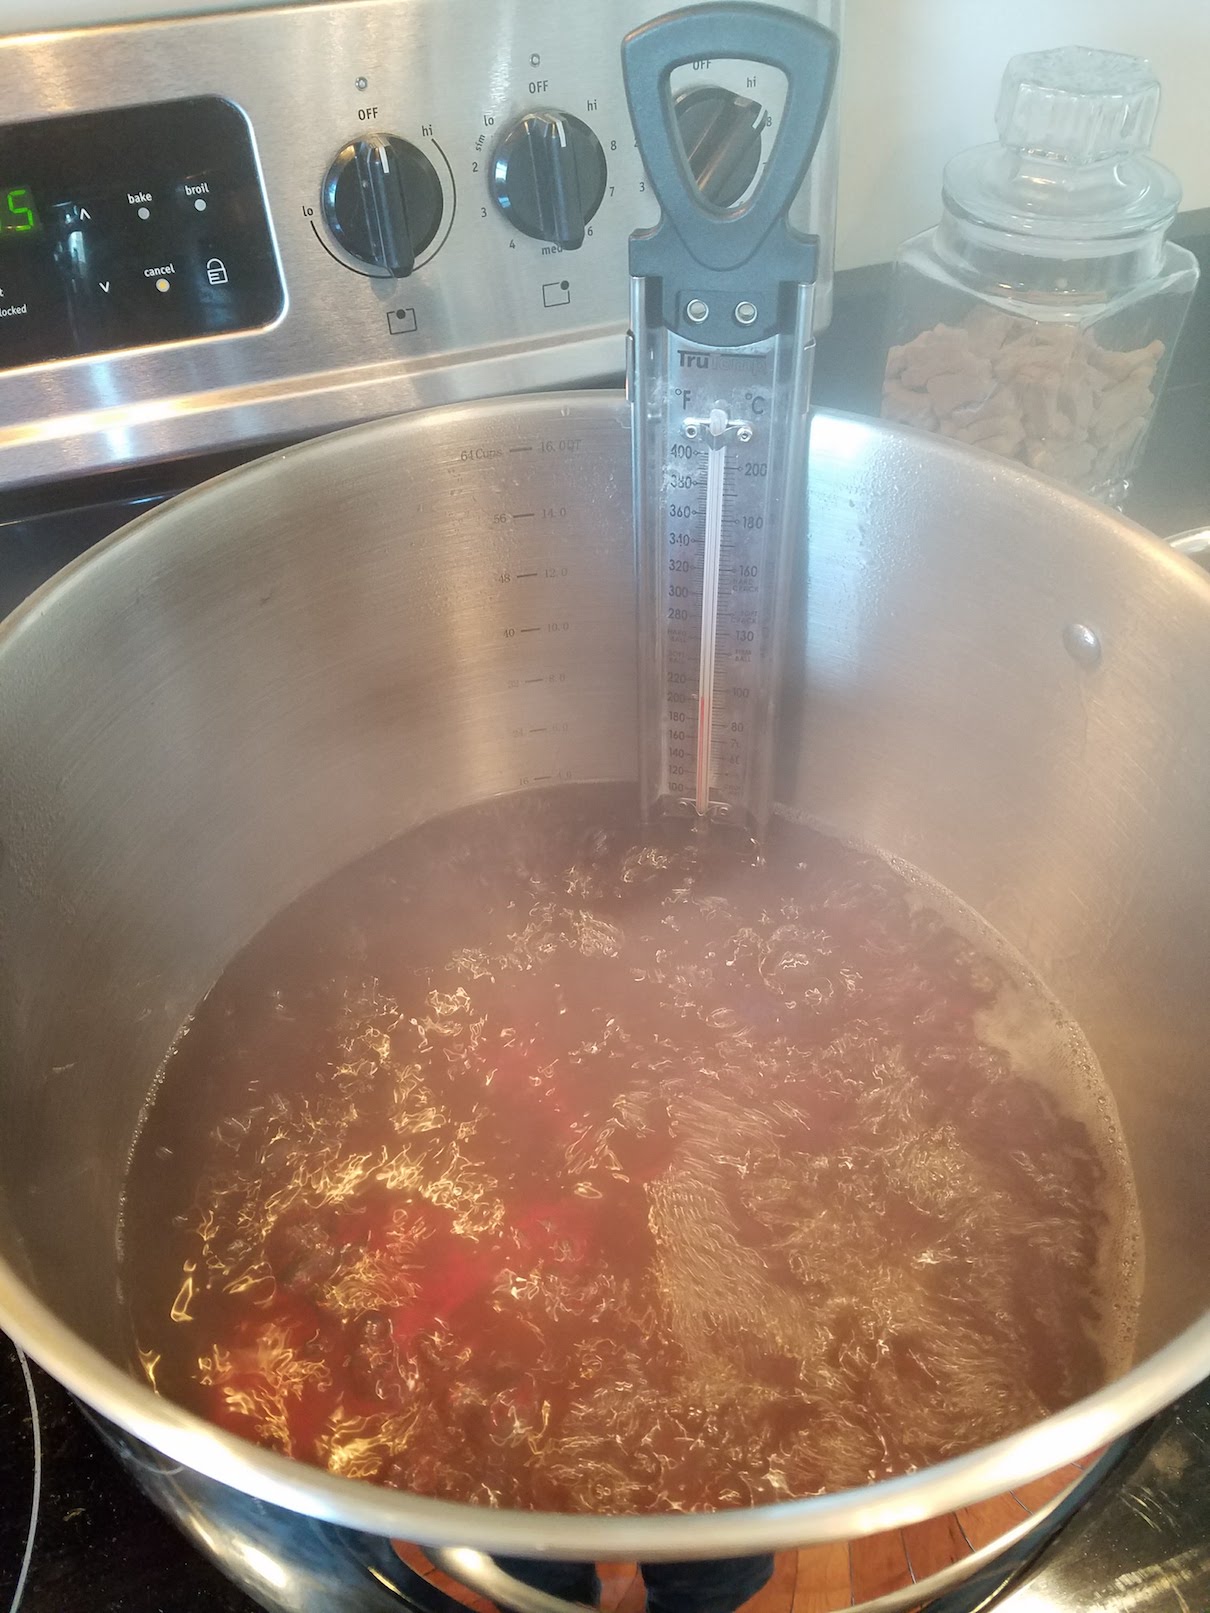
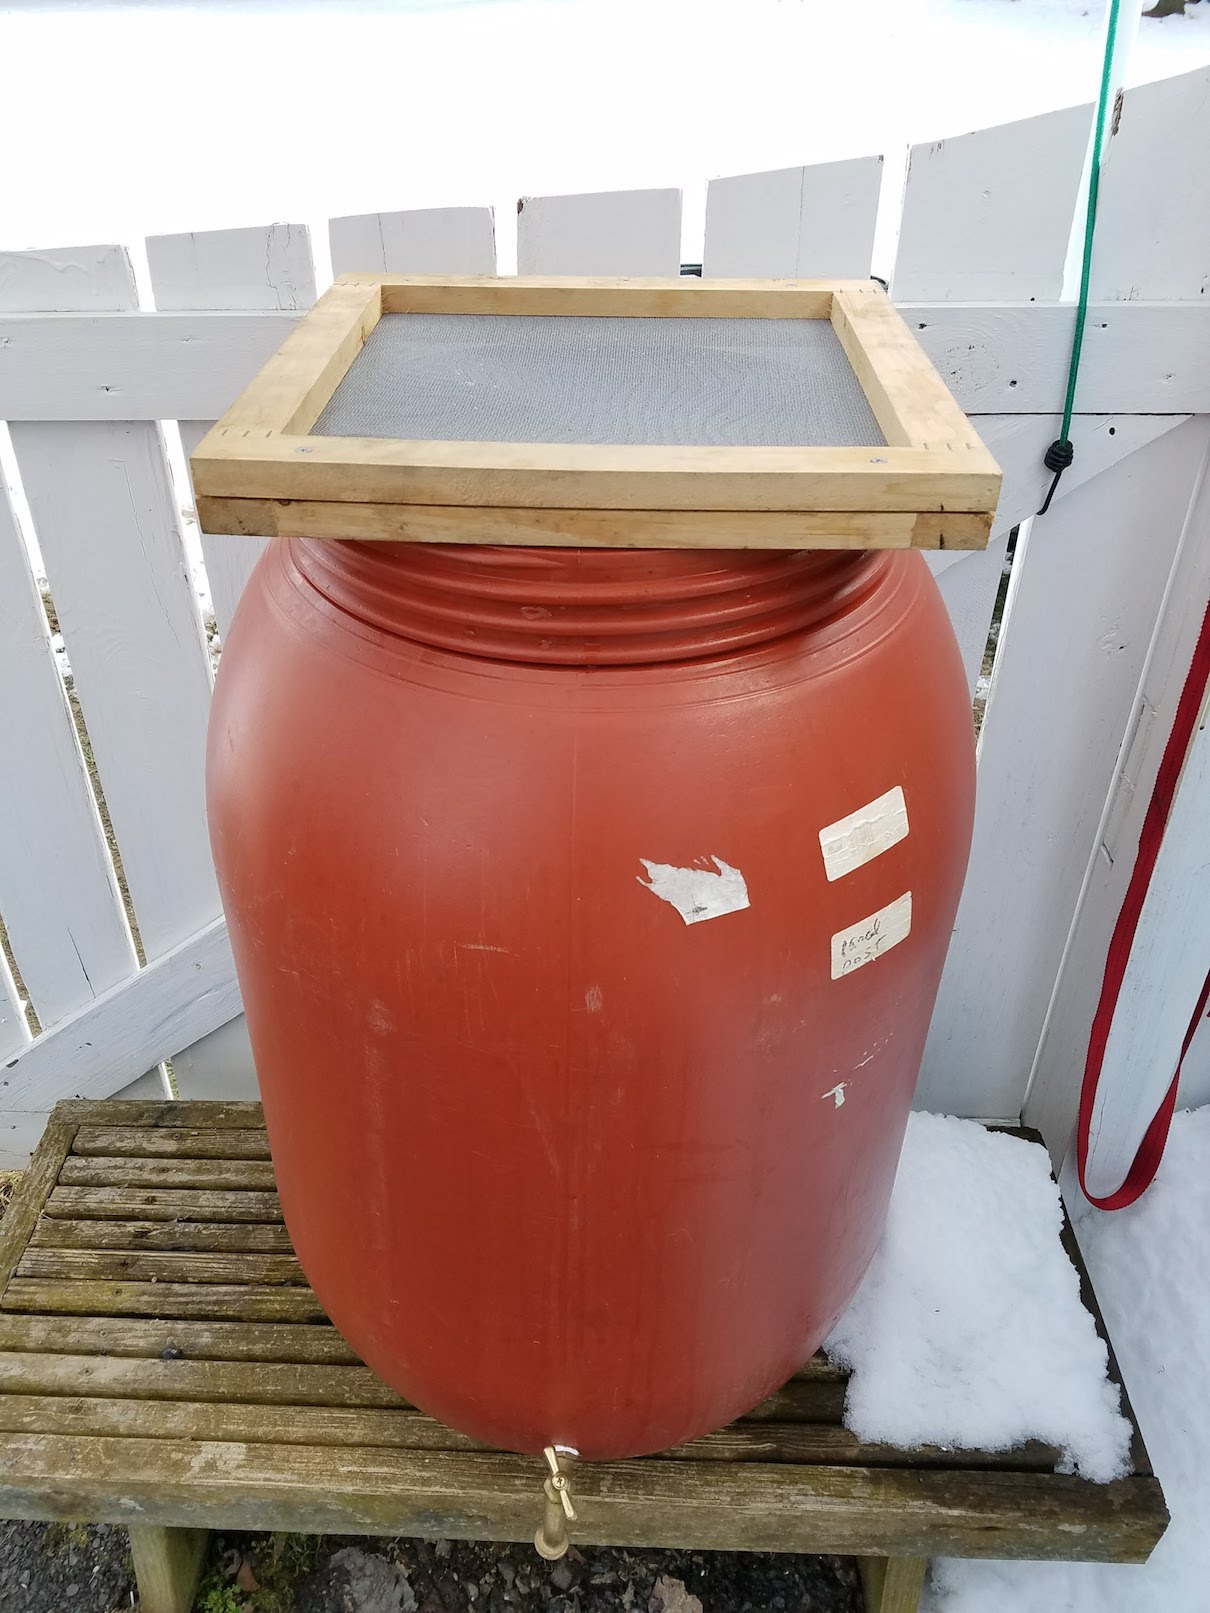
All that being said, I boil the sap to within a few degrees of syrup over the fire, and bring it inside for the last bit of boiling. I just find it easier to control. Syrup is syrup at 7 degrees above the boiling temperature of water (212 degrees at sea level). I use a hydrometer to ensure the proper density and don’t rely solely on the thermometer. An important aspect of making maple syrup is filtering the syrup. The boiling process introduces something called sugar sand to your syrup. It’s technically edible, but it leaves a cloudy sediment in your syrup. If you filter your syrup and bring it to a boil again, more sugar sand is produced. I filter twice. I filter the syrup when I first bring it inside. I then finish the boil and filter it again. I’ve heard of all sorts of things being used for filters, from old t-shirts, to paper towels, to coffee filters. I have an actual maple syrup filter and line that with a disposable paper pre-filter. Just be patient, as it takes a while for the syrup to flow through the filter. After the second filter, I put the syrup back in a pan and keep it on low heat so that it stays around 185 degrees for bottling or canning it. You can buy actual syrup bottles, or just use canning jars. I use a ladle to fill my bottles. Just be sure to put the caps/lids on right away so that you get a good seal as it cools.
…and there you have it. That pretty much covers the process from start to finish. I will tell you that everyone’s situation is a little different and results may vary. This year I tapped 4 Sugar Maples, 2 Red Maples, and 1 Norway Maple, and ended up with about 3 gallons of syrup. I probably have about 60 hours of tapping, collecting, boiling, and cleaning up all the equipment. Definitely not cheaper than going to the local farm stand to buy their syrup…but a whole lot more rewarding.
A couple other pointers that may be handy to the first timer backyard syrup producer.
- Start small… If you’re just giving the whole maple sugaring process a try, tap just a couple trees, make it manageable, keep it fun, and figure out your process before you take on more trees.
- Bribe your neighbors… If your neighbors have some sugar maples, most of the time, they will be willing to let you tap their trees. Even more so if you offer them some delicious homemade syrup in trade.
- Do your homework… There are lots of online resources for ideas on backyard sugaring. In most syrup producing states, during the peak maple season, many producers offer tours of their facilities. These are all great ways to learn and get tips to help you with your own operation.
- Invite your neighbors… There’s not much that attracts the interest of your neighbors more than a bucket hanging from a front yard maple and smoke billowing from a fire in the backyard. Before you know it, folks will be gathered around the fire watching sap make the slow transition from near water to syrupy goodness. Why boil alone when you can have a party while you’re at it.
- Experiment… Once you get the process of making syrup down, try your hand at some maple cream or maple candy. All you have to do is boil your syrup a little longer and know what to do with it at various temperatures.
- Here are some online resources for tips and equipment that I have used over the years:
I hope that sharing my story of maple sugaring has inspired some of you to do some research and give it a try on your own. You’ve only got about ten months to get ready for next season. Go on, what are you waiting for? 🙂