I love making maple syrup…and I love carpentry. Two totally unrelated activities, until recently.
You see, I am a hobby maple syrup producer… they call us backyard sugarers to be exact…and that’s exactly where I’ve done my sugaring til now…in the backyard and in the elements. For those that don’t know, maple syrup is not the stuff you find in that bottle labeled pancake syrup or table syrup. No, that is an imposter to the pure gooey goodness that can only be created by collecting large amounts of sap from a maple tree and boiling it down for ridiculously long hours to end up with the tiniest portion of pure maple syrup.
Check out our article on backyard sugarin for more on maple syrup…
Before I begin, I will inform you that I am not an architect or even a professional carpenter by day. It is a trade I learned from my dad, starting at the young age of 13 and have continued to love to this very day. I’m writing this article because when I was searching for ideas on sugar shack construction, it was hard to find a source containing the details I was looking for. That being said, if you are an aspiring sugarer building a sugar shack, and choose to mimic any of the techniques I used in the construction of my own sugar shack, I am not responsible for any misfortune that may come your way as a result of said actions. I believe my structure to be of sound design and has already withstood hurricane force winds and heavy snows, but that could be pure dumb luck, and your results may vary.
With the legal disclaimers clearly stated, let’s carry on with the article…
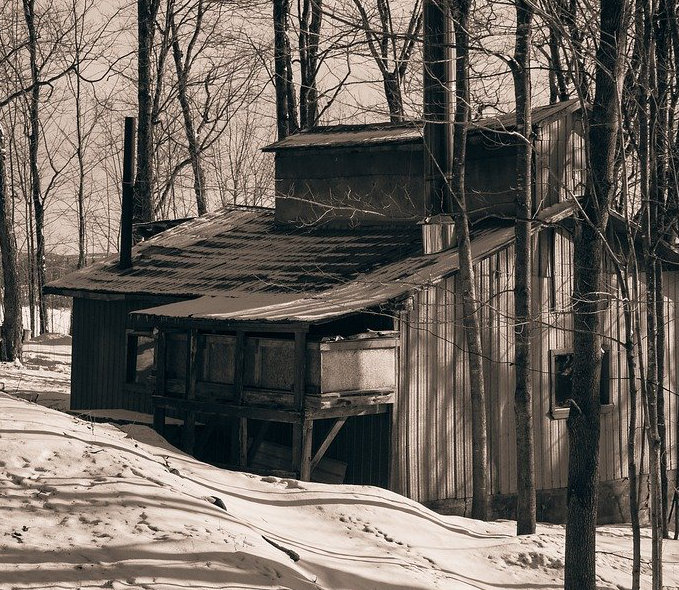
I have always liked the look of the traditional sugar shack…and back where I came from, many of them were just that, small shacks with a metal chimney sticking out of the roof with an opening cupola on it to let out the copious amount of steam that is produced when boiling maple sap. For many years, I’ve been trying to convince my wife that we needed one of these structures on our property. Now, don’t get me wrong, a structure like this is barely justified for our couple acre parcel and is certainly not justified by the size of my maple sugaring operation. Having never tapped more than eight maples, one could barely form a case for even dedicating a small garden shed to an operation of this size, let alone a full sized building.
Having never been accused of making decisions completely out of necessity, in the summer of 2018 I must have caught my wife in a moment of weakness, and I successfully convinced her that a project such as this would not only make my maple sugaring more enjoyable, but it would add to the value of our property in the event that we ever had a desire to sell…quickly, perhaps an event brought on by one’s bride leaving him on account of foolish spending…something like that. But spousal approval was only the first step in this quest to construct a fine ‘New Englandy’ sugar shack. I was going to need the town’s approval as well. I had already burned my ‘outbuilding allowance’ with the construction of my first ‘shed’ that has become the home for motorized sources of happiness and essential lawn care machinery over the years. Since I was going to have to get official municipal permission, I figured I might as well ask for as big a building as I had the time and the money to construct. So, I did exactly that.
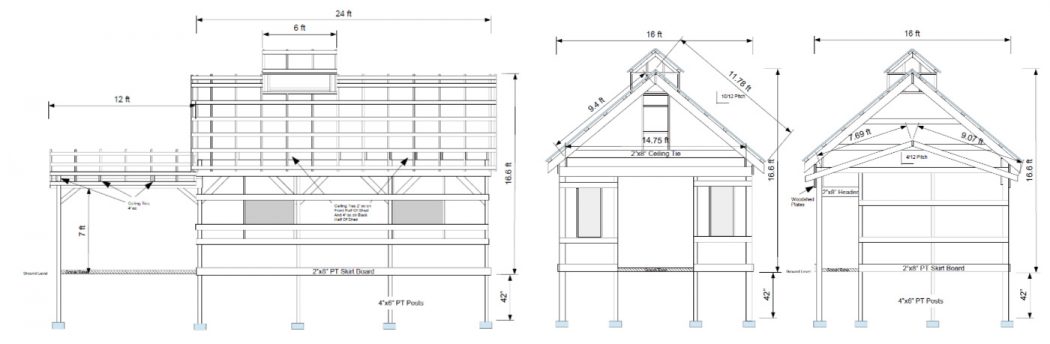
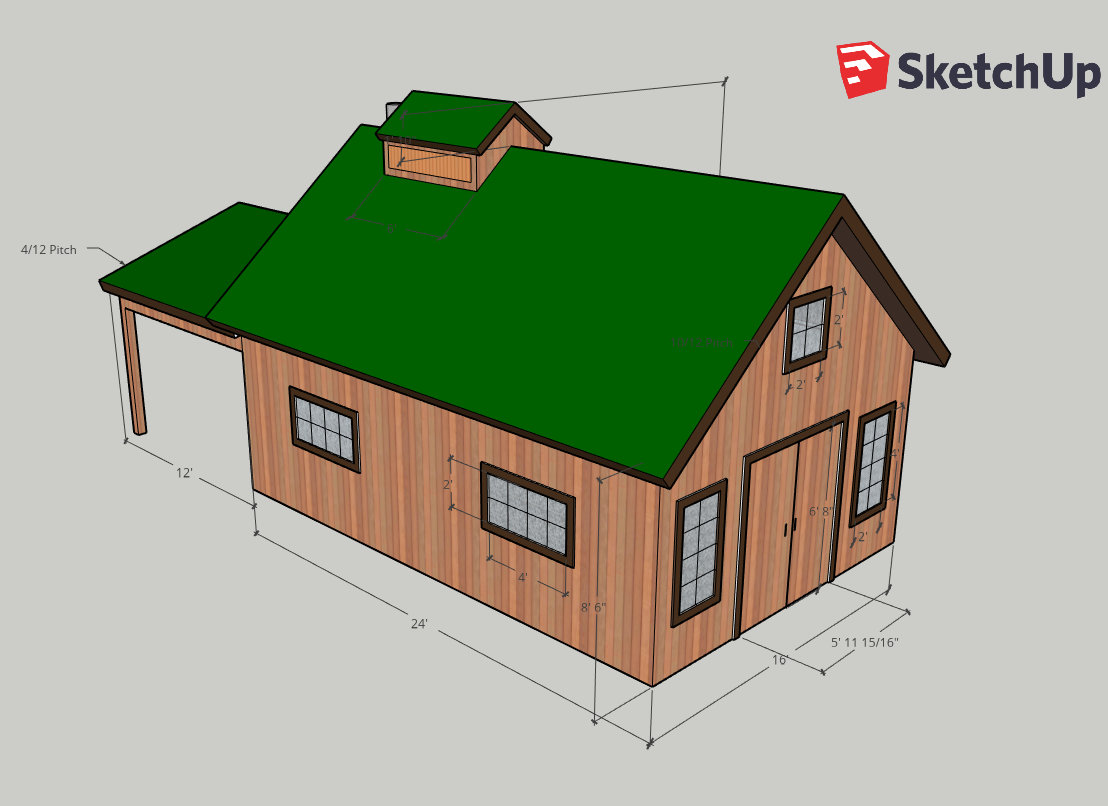
There was a traditional sugar shack design I found on the University of Vermont website for a 24’x16’ building with a 12’x16’ overhang for storing firewood and other items that needed protection from the elements. It seemed to provide most of the things I was looking for and was a decent size for my property. I did tweak the design some, a steeper roof, more windows, different doors, and a few other things to put a bit of my own twist on the building. After pleading with the powers that be and promising to not turn said structure into a retail maple establishment, I was granted the necessary permission to commence construction of my very own sugar shanty.


Photo Credit: University of Vermont
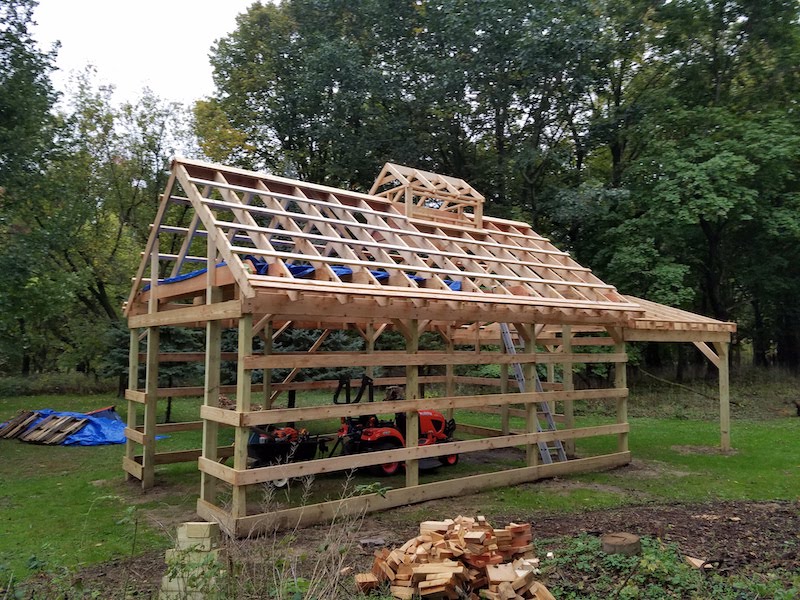
I decided on pole barn construction as my framing method of choice for this building project. I had never actually built a pole barn style building, but there were enough videos on the youtubes that convinced me that despite lacking proper training, I could pull this off. Unfortunately, due to last minute planning, the delay of government negotiations, and an untimely toppling of a large tree on my building site, I was not even getting started until mid September. With days already becoming shorter and mornings becoming cooler, I enlisted the help of my buddy Adam, who had some time available, to assist me with the parts of my project where a helping hand would make all the difference.
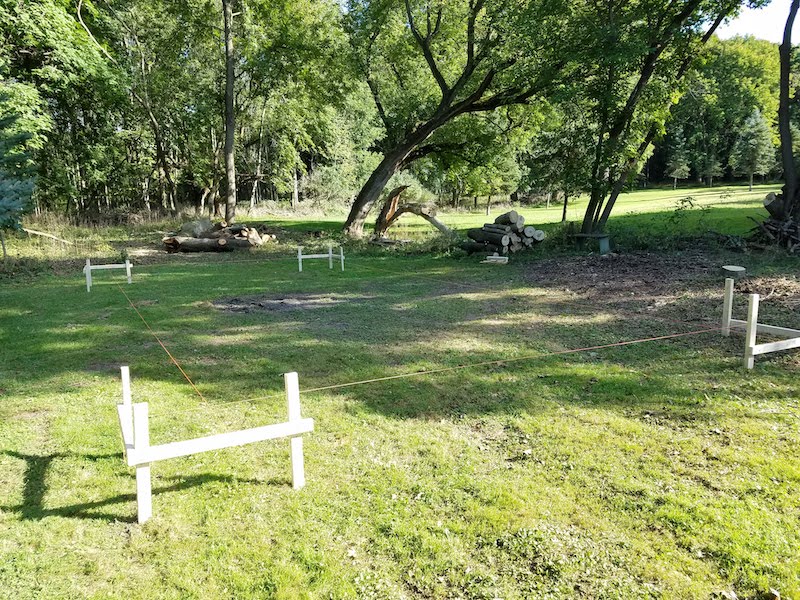
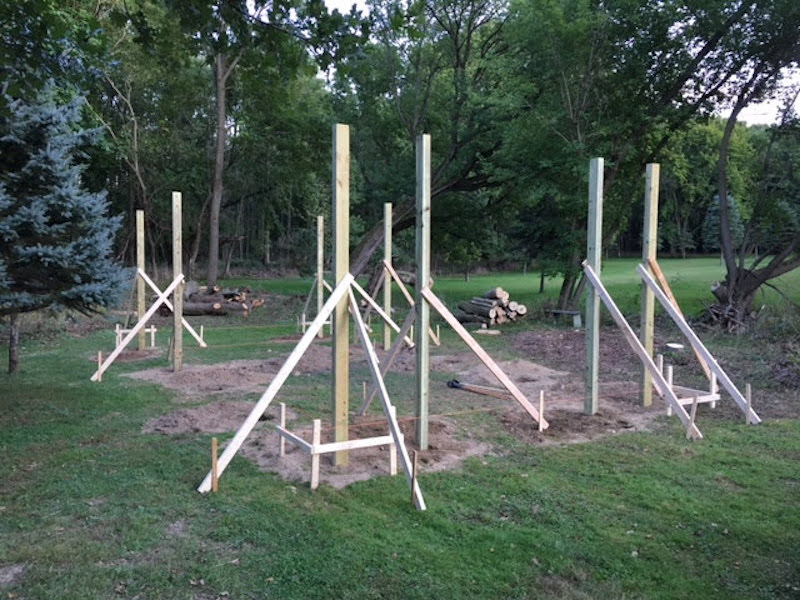
With some stakes in the ground and some strings outlining the designated location, I rented a post hole digger to dig the 14 holes required for the posts that would support the structure. In typical fashion, renting equipment from your local big box store can prove entertaining. At one point the recoil cord came off in my hand when starting the beast, only to soon be followed by getting the auger stuck 4 feet deep in our wonderful western NY clay, requiring hand digging an adjacent 4 foot hole to release it. With all the holes dug, we tossed in some cement in the bottom of each to provide a solid footing for the 4”x6” posts that we’d be setting.
Now, at this point, I’m sure there are those construction gurus that have more experience than I with this whole pole barn building thing, that are thinking to themselves that this guy should have filled the holes with gravel, or perhaps encased the posts in concrete, or poured concrete posts… yep, all valid thoughts. But, it seems that there are more opinions on how to actually set poles for a pole building than there are actually pole buildings in the world, so I went with a post on a concrete footer backfilled with soil. I did spend the extra money to order the higher quality pressure treating for my poles, and I’m gonna hope that through the modern science of fancy chemicals, my posts outlive me.
The beauty of pole barn construction is that you make a lot of progress quite quickly and it doesn’t take too long to have something that looks like a real building standing in your backyard. What I came to learn is this is really just a false sense of hope, and that everything else beyond this point would take longer than expected. Having never built a pole barn before, what I found was that squaring up a building that is nothing more than a bunch of posts sticking out of the ground and swaying in the wind can prove to be somewhat of a challenge. It’s a lot like trying to align the trees in the forest after they are fully grown.
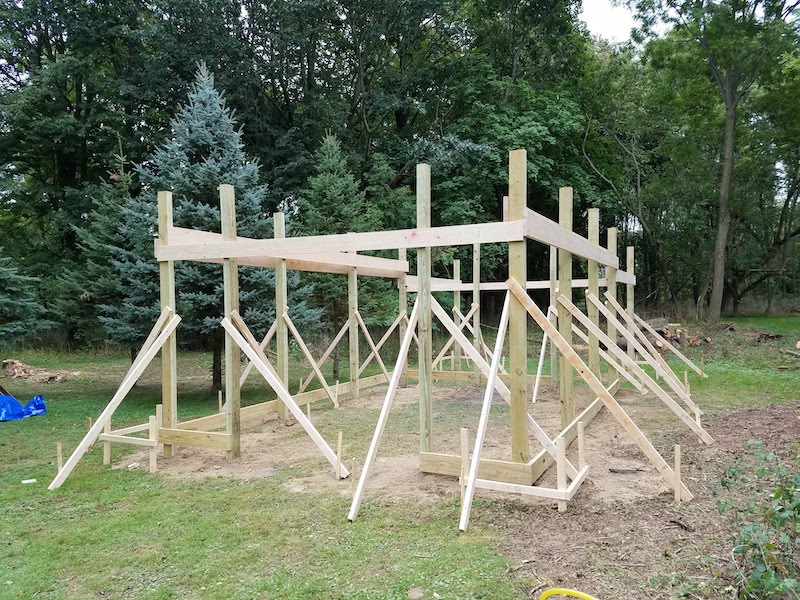
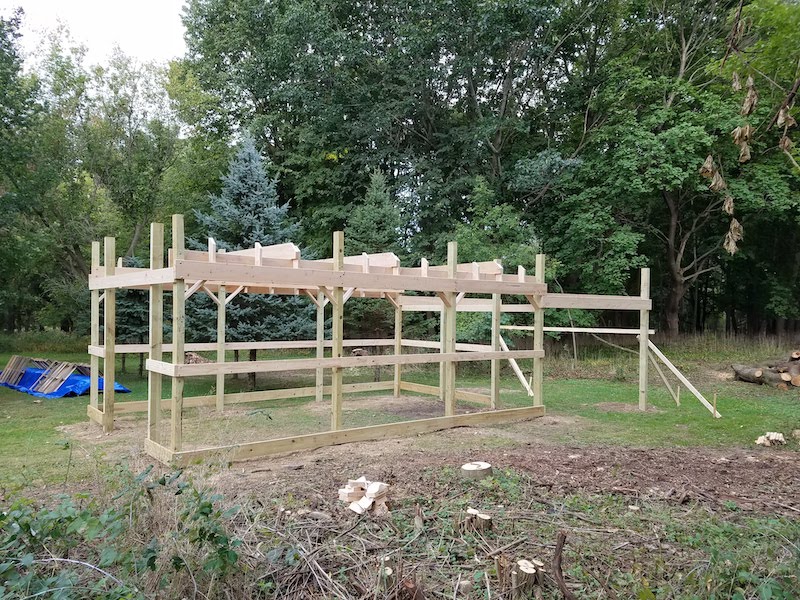
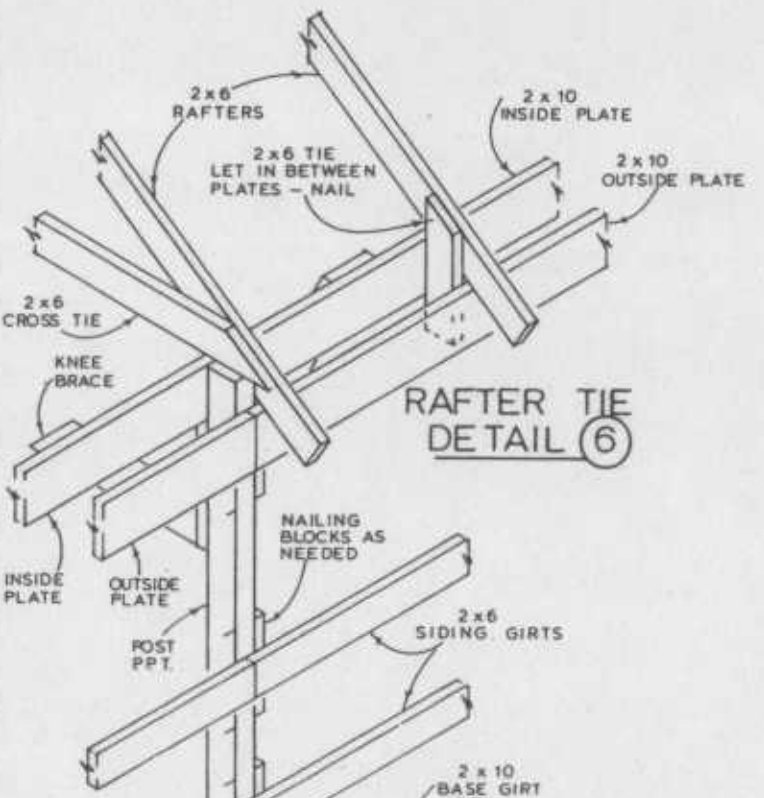
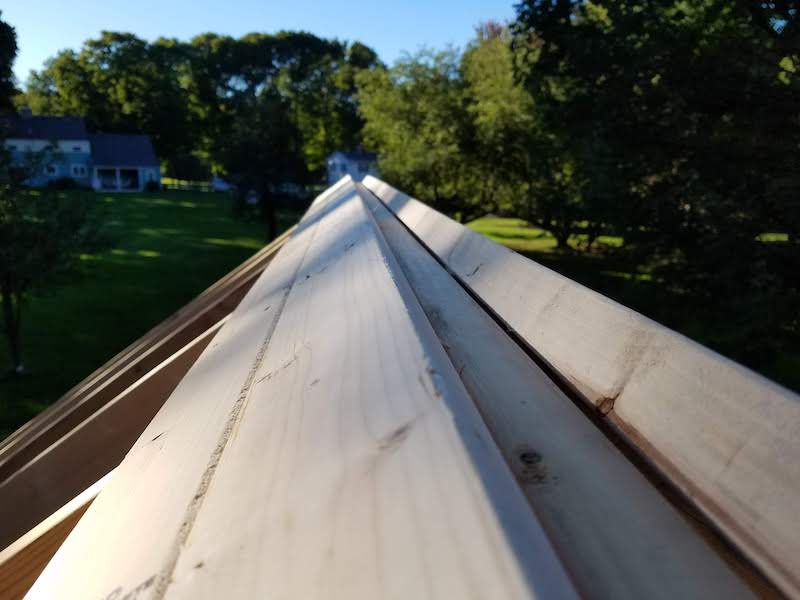
With the posts and nailing girts in place, it was time to frame upward. The plans from the Vermont site had a neat design for a top plate system that would support and hold the rafters in place and didn’t require the traditional bird’s mouth to be cut in the rafter. After careful layout for my 10/12 pitch roof, it was not until I set my first rafters in place that an eight of an inch miscalculation in lumber dimensions resulted in my 10/12 pitch roof losing a whole pitch and becoming a 9’ish/12 pitch roof…which was what the original design had called for, so I chalked it up to destiny and drove on. I installed a loft floor over the front half of the building which will provide some storage for things in the off season. The cupola framing took a fair bit of head scratching to get things just the way I wanted them, but came together nicely. I installed the 2″x4″ purlins to support the roofing, and before too long, the sugar shack was completely framed.

Check out the rest of the project in Part II of our story.
Resources used in this phase of construction:

Matthews & Fields Lumber - All framing supplies

University of Vermont - Sugar House Design Ideas

Google Sketchup - 3D Design Tool

Open Office Draw - 2D Design Tool